Create New Orders
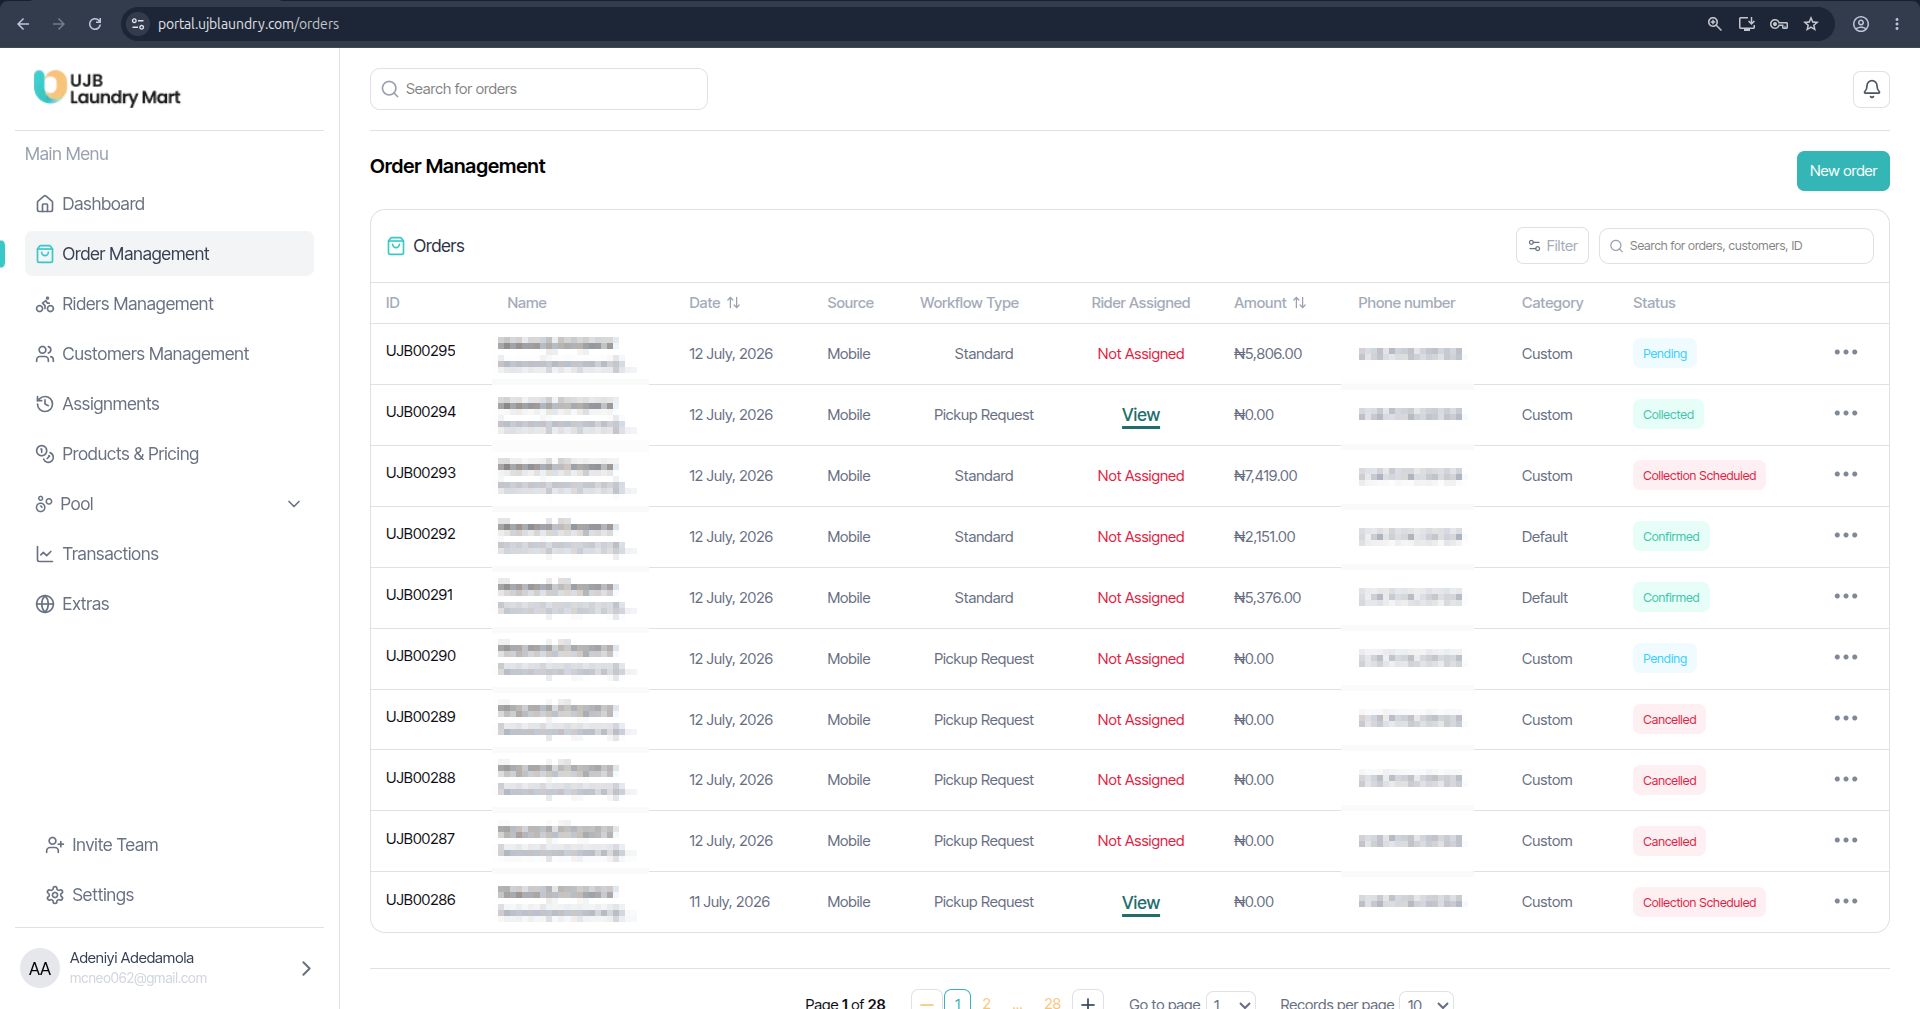
The portal supports two distinct operational workflows to accommodate different order origins: Standard Workflows (initiated by admins in-portal) and Pick-up Requests (initiated by customers on their mobile devices).
Standard Workflows
A Standard workflow is launched and managed entirely by an administrator within the UJB portal.
Step-by-Step Creation Pipeline
To create a Standard order, click the New Order button in the top-right corner of the Order Management page to enter the 6-step wizard:
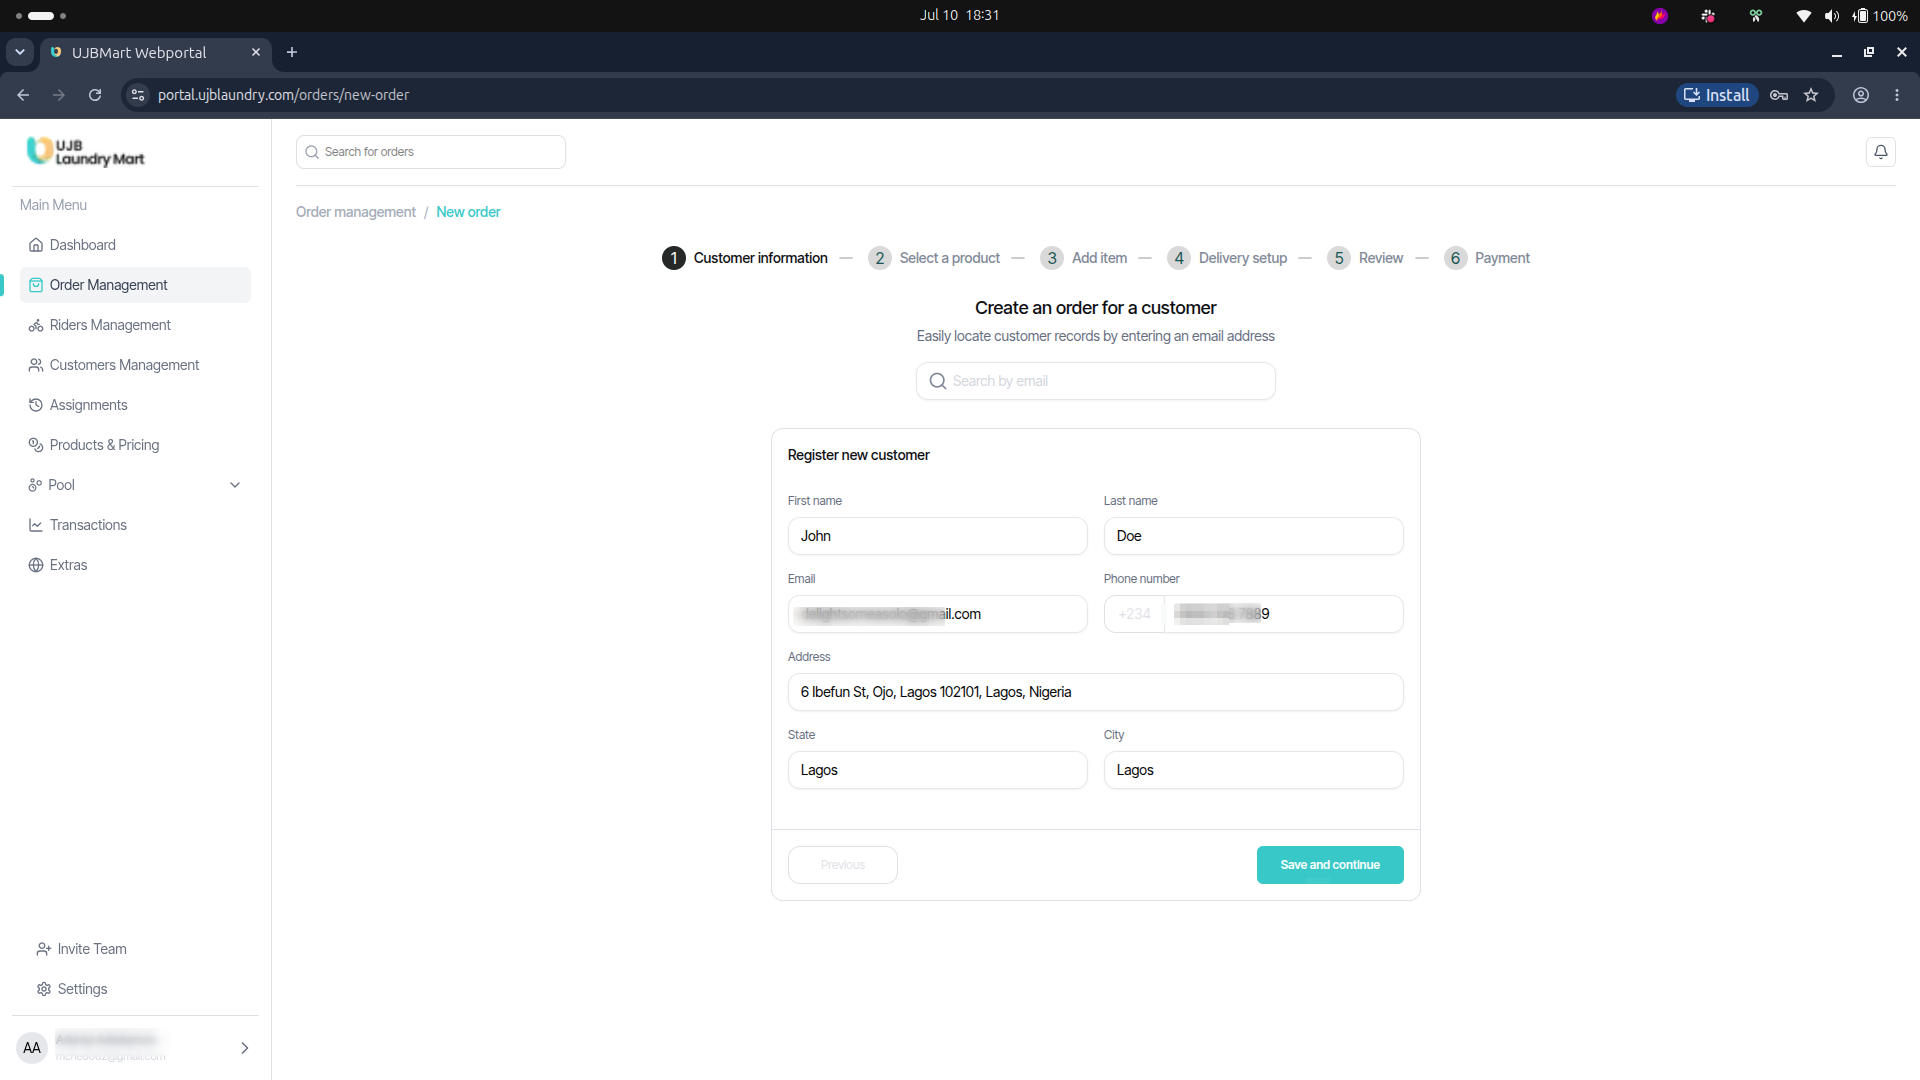
- Customer Information: Register a new customer by entering their demographic data including First Name, Last Name, Email, Phone number, and full Address (Street, State, City).
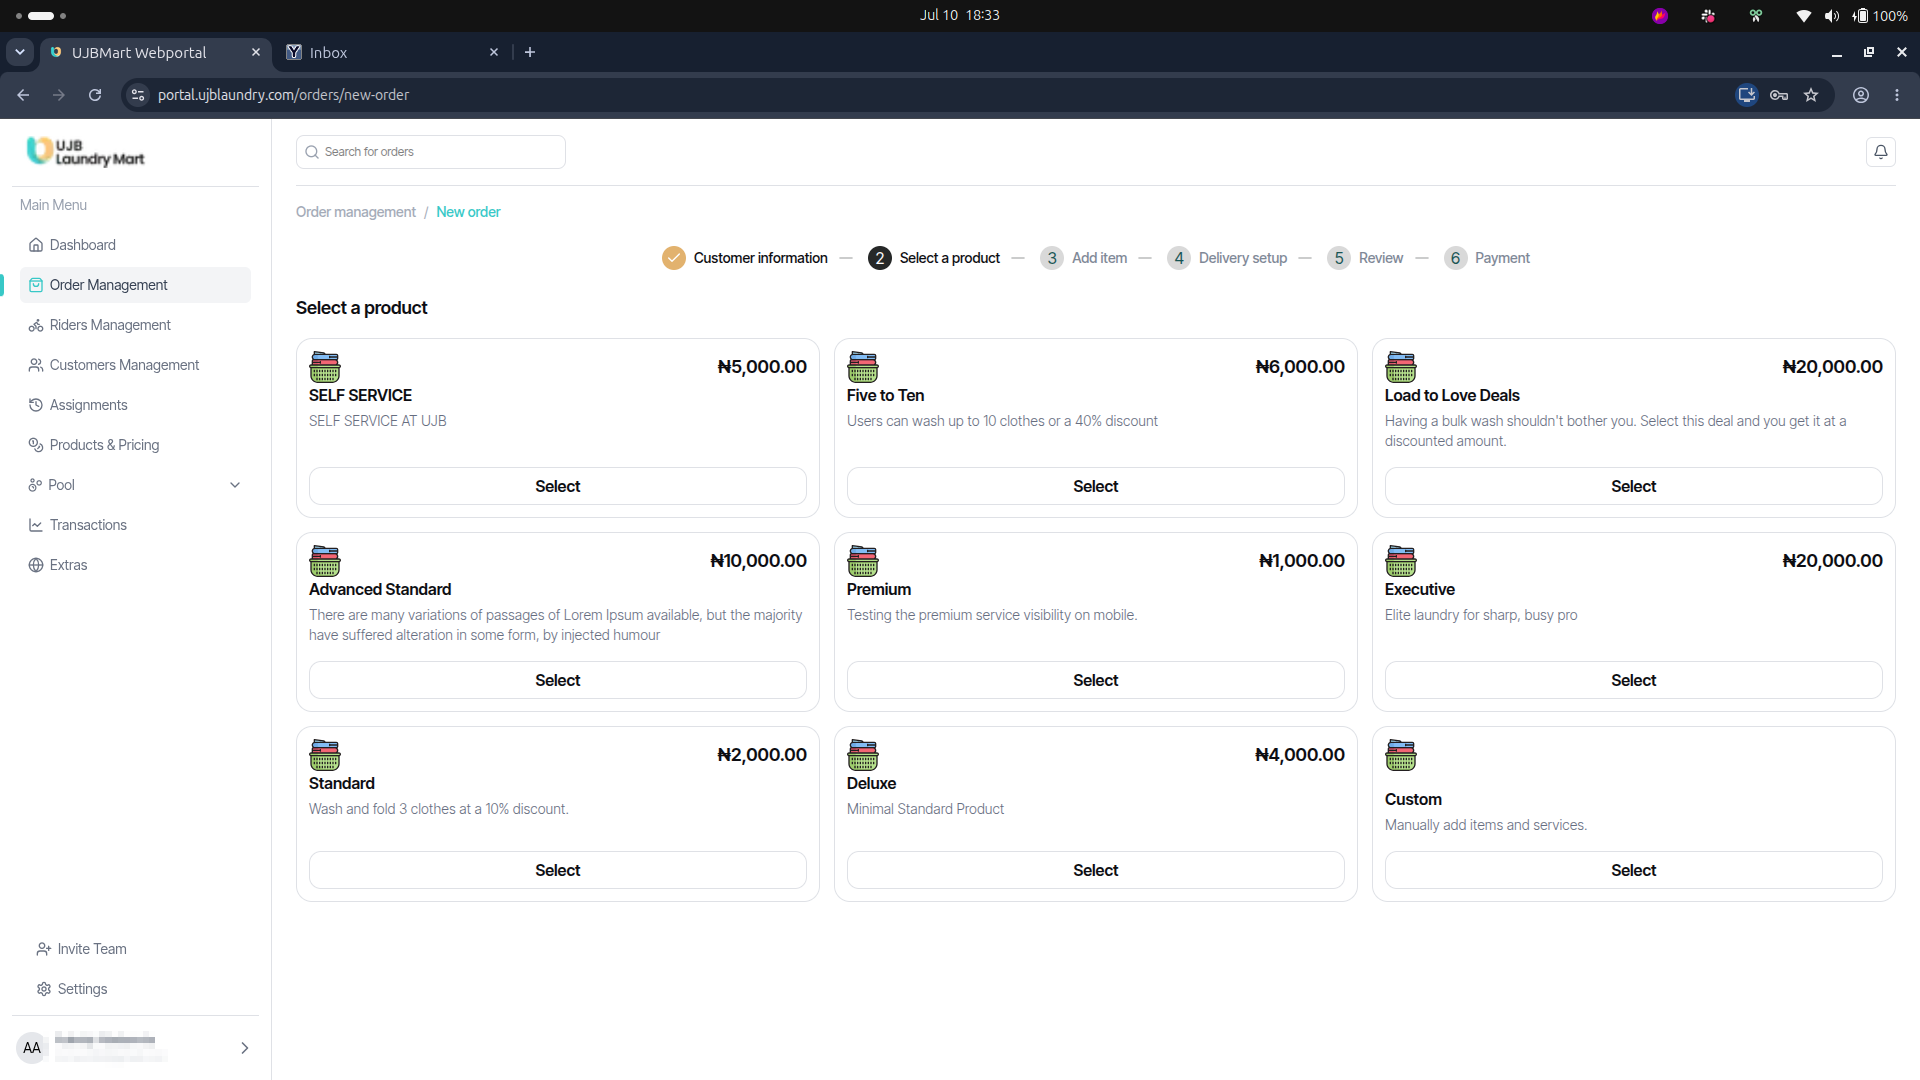
- Select a Product: Choose an active laundry service package (e.g., Self Service, Five to Ten, Advanced Standard, Standard, Premium, Deluxe, Executive, Load to Love Deals, or Custom).
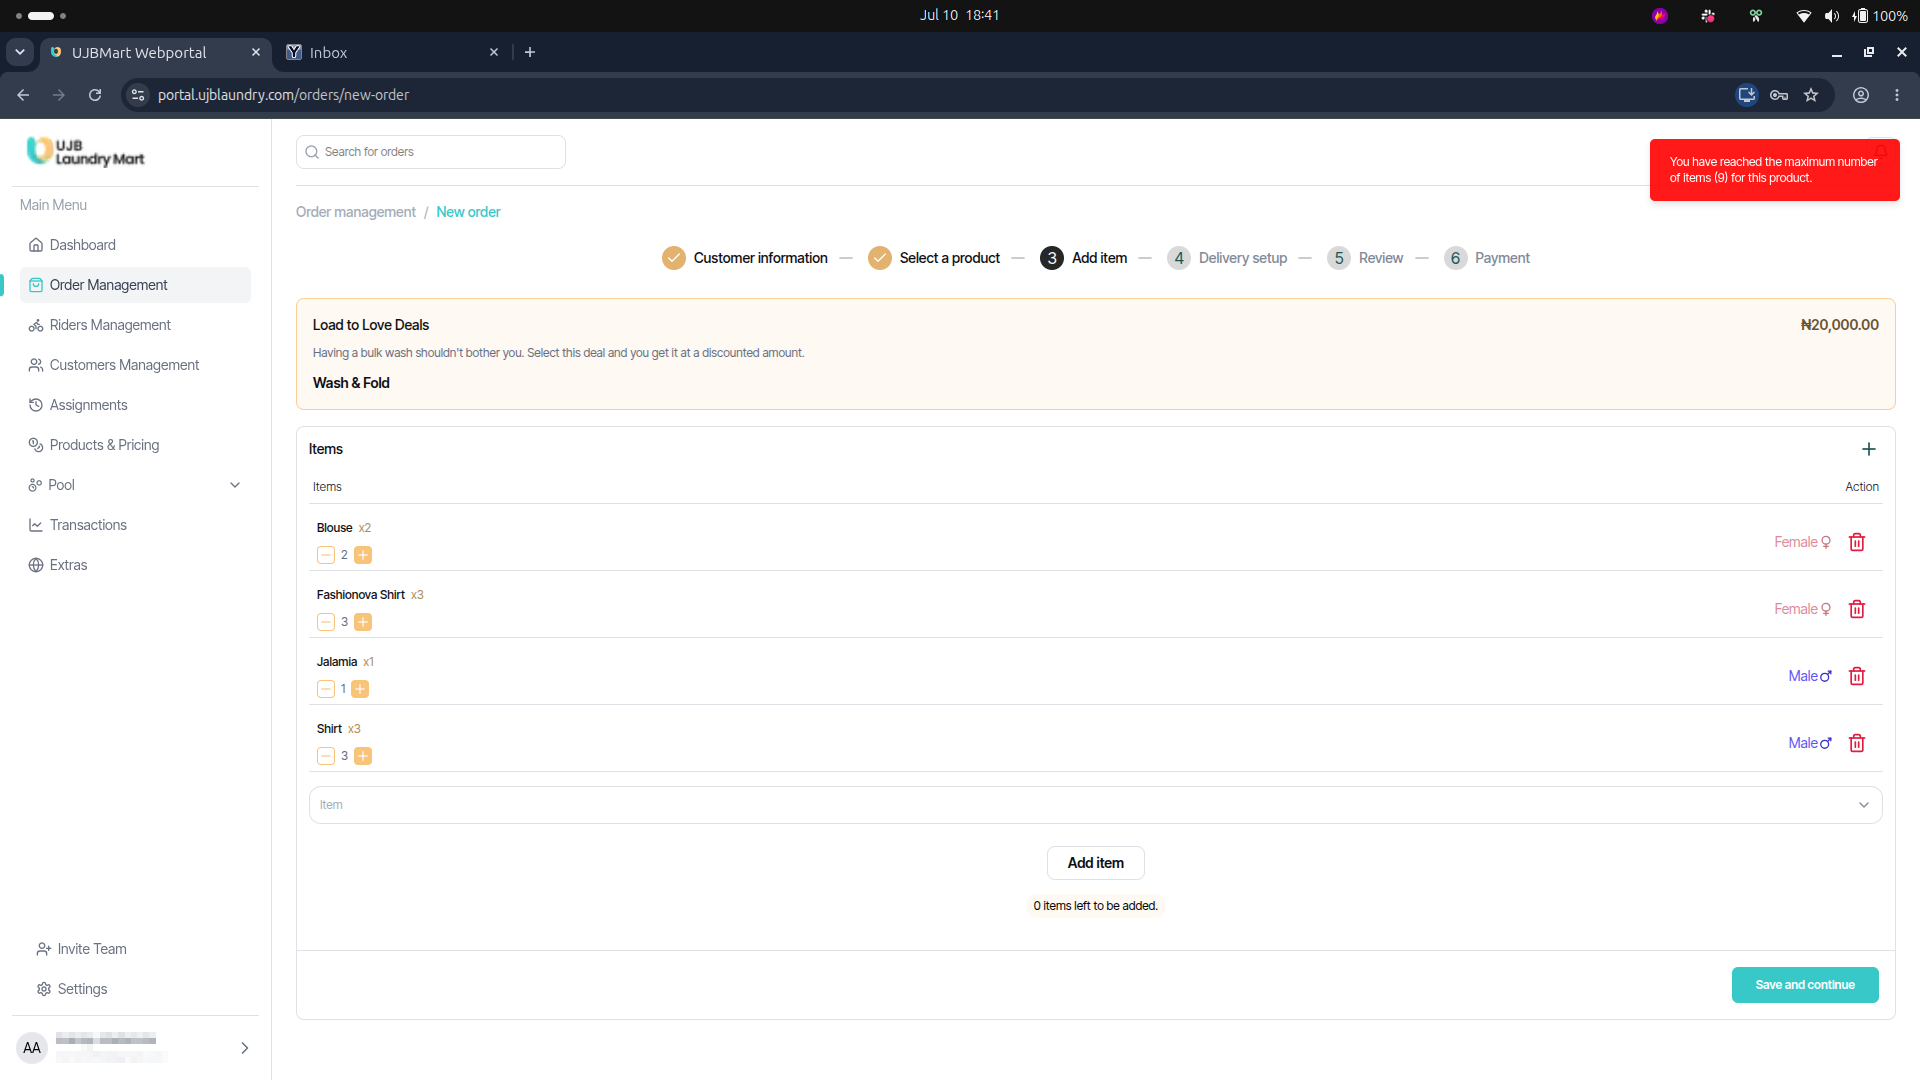
- Add Item: Add individual clothing pieces under the selected product package.
⚠️ Item Limits: Every product enforces a maximum item threshold. Exceeding this allowance triggers a system alert: "You have reached the maximum number of items for this product."
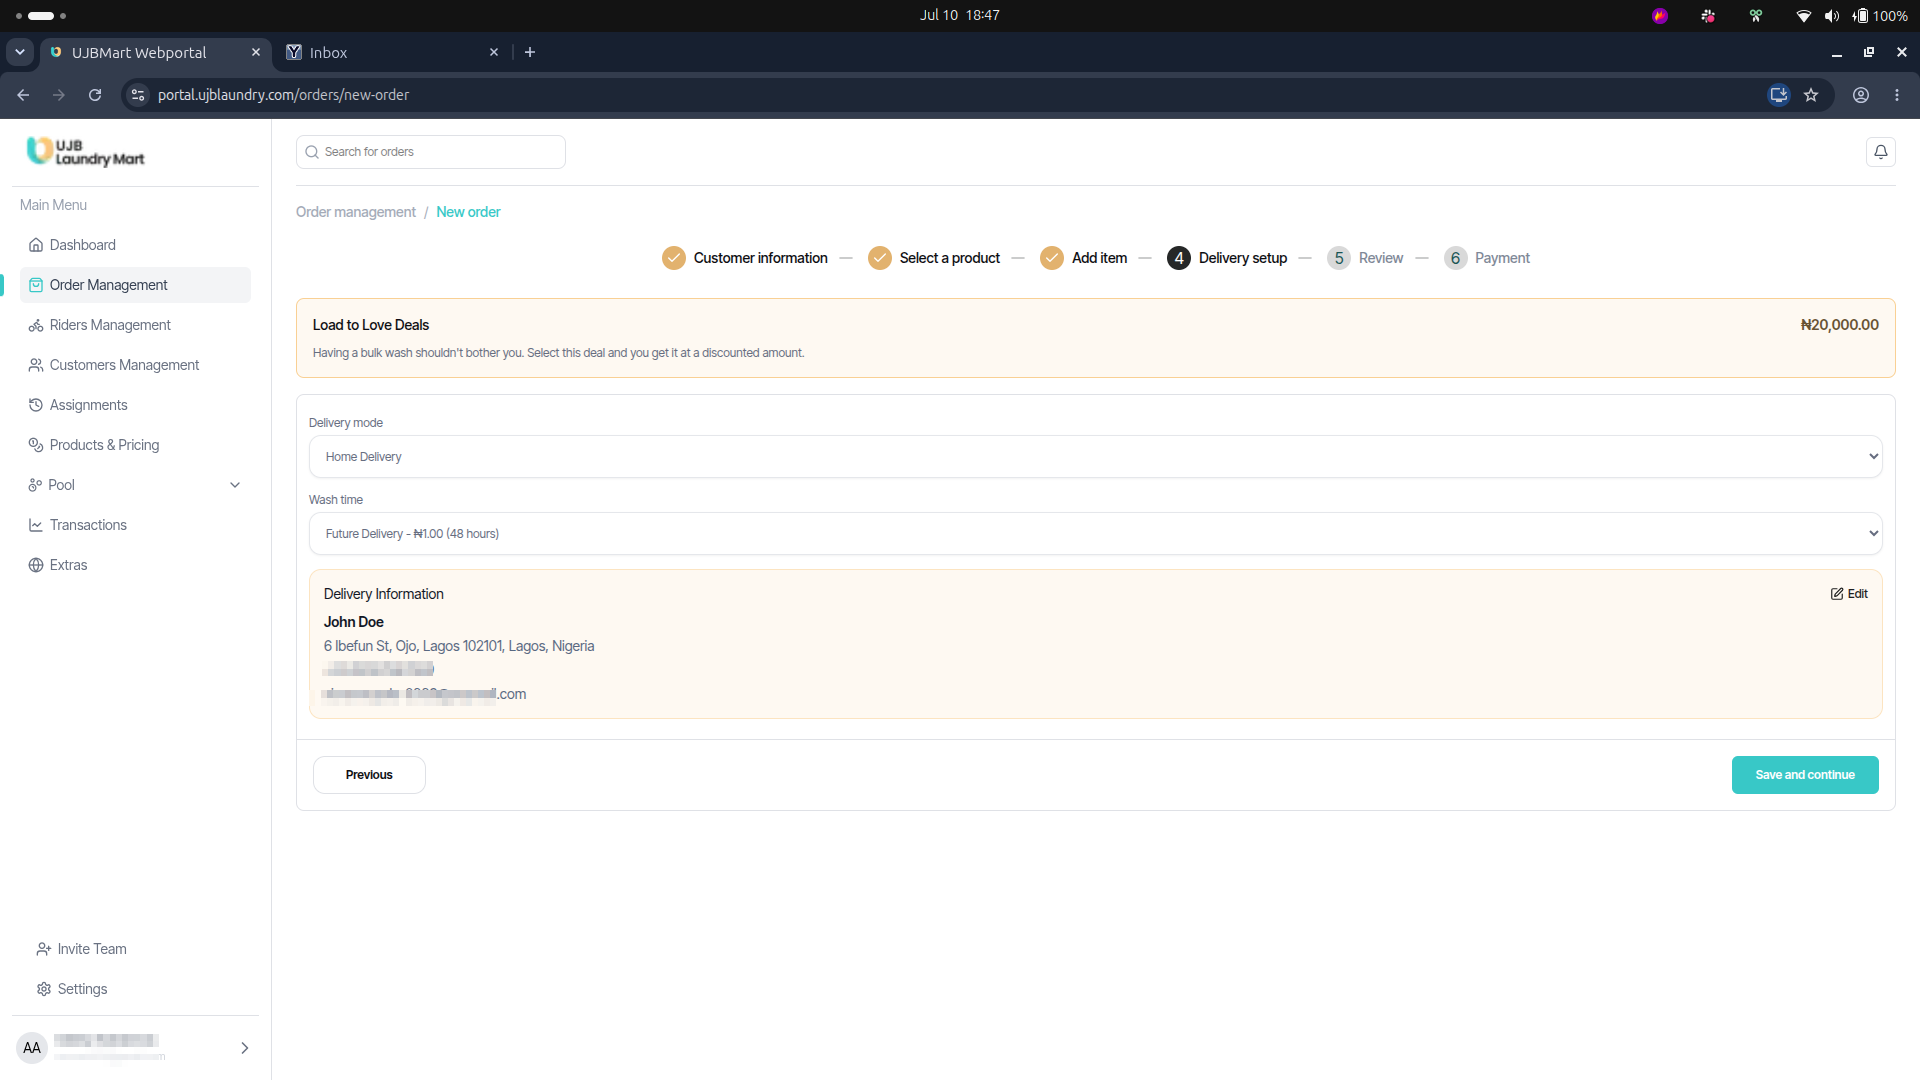
- Delivery Setup: Configure logistics methods (e.g., Home Delivery or Express Delivery) and verify destination details.
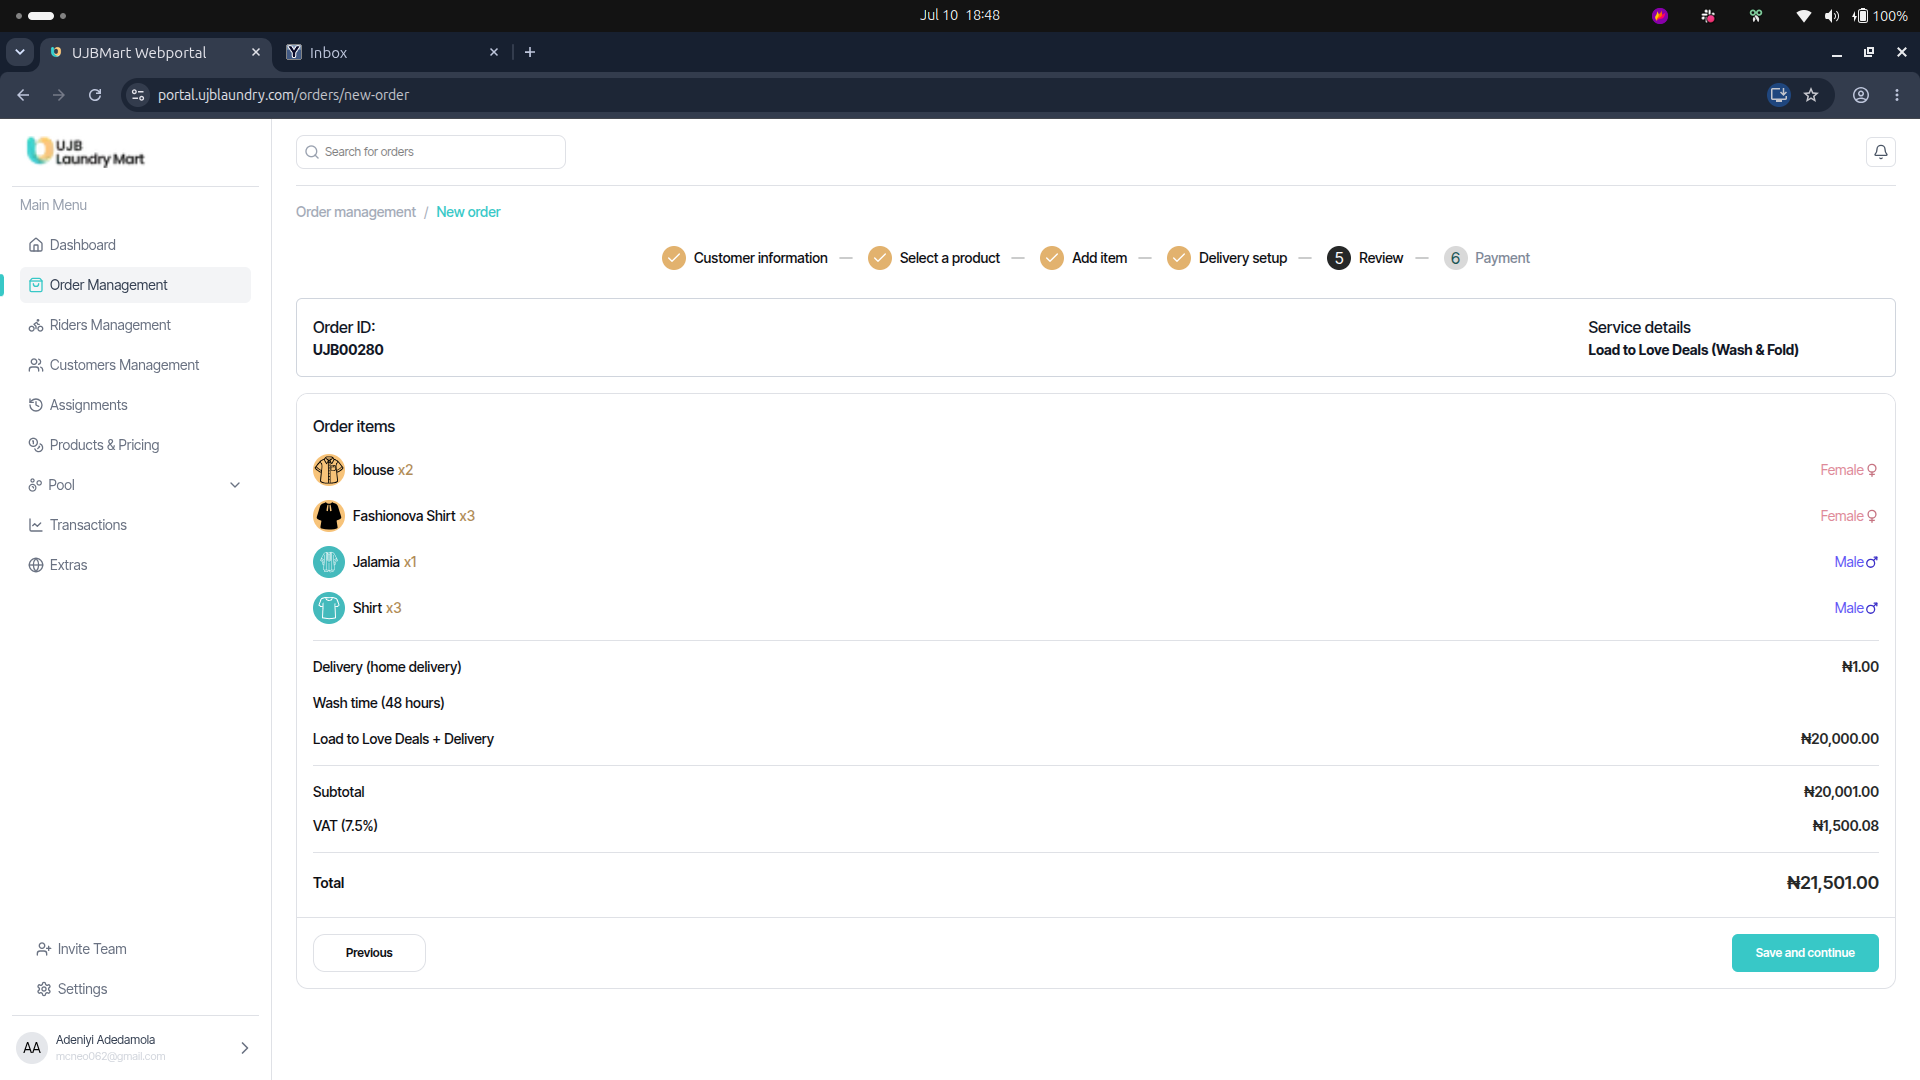
- Review: Review a complete, itemized summary of the basket, turnaround metrics (Wash time), subtotal values, and calculated value-added tax (VAT EXEMPT or standard percentages).
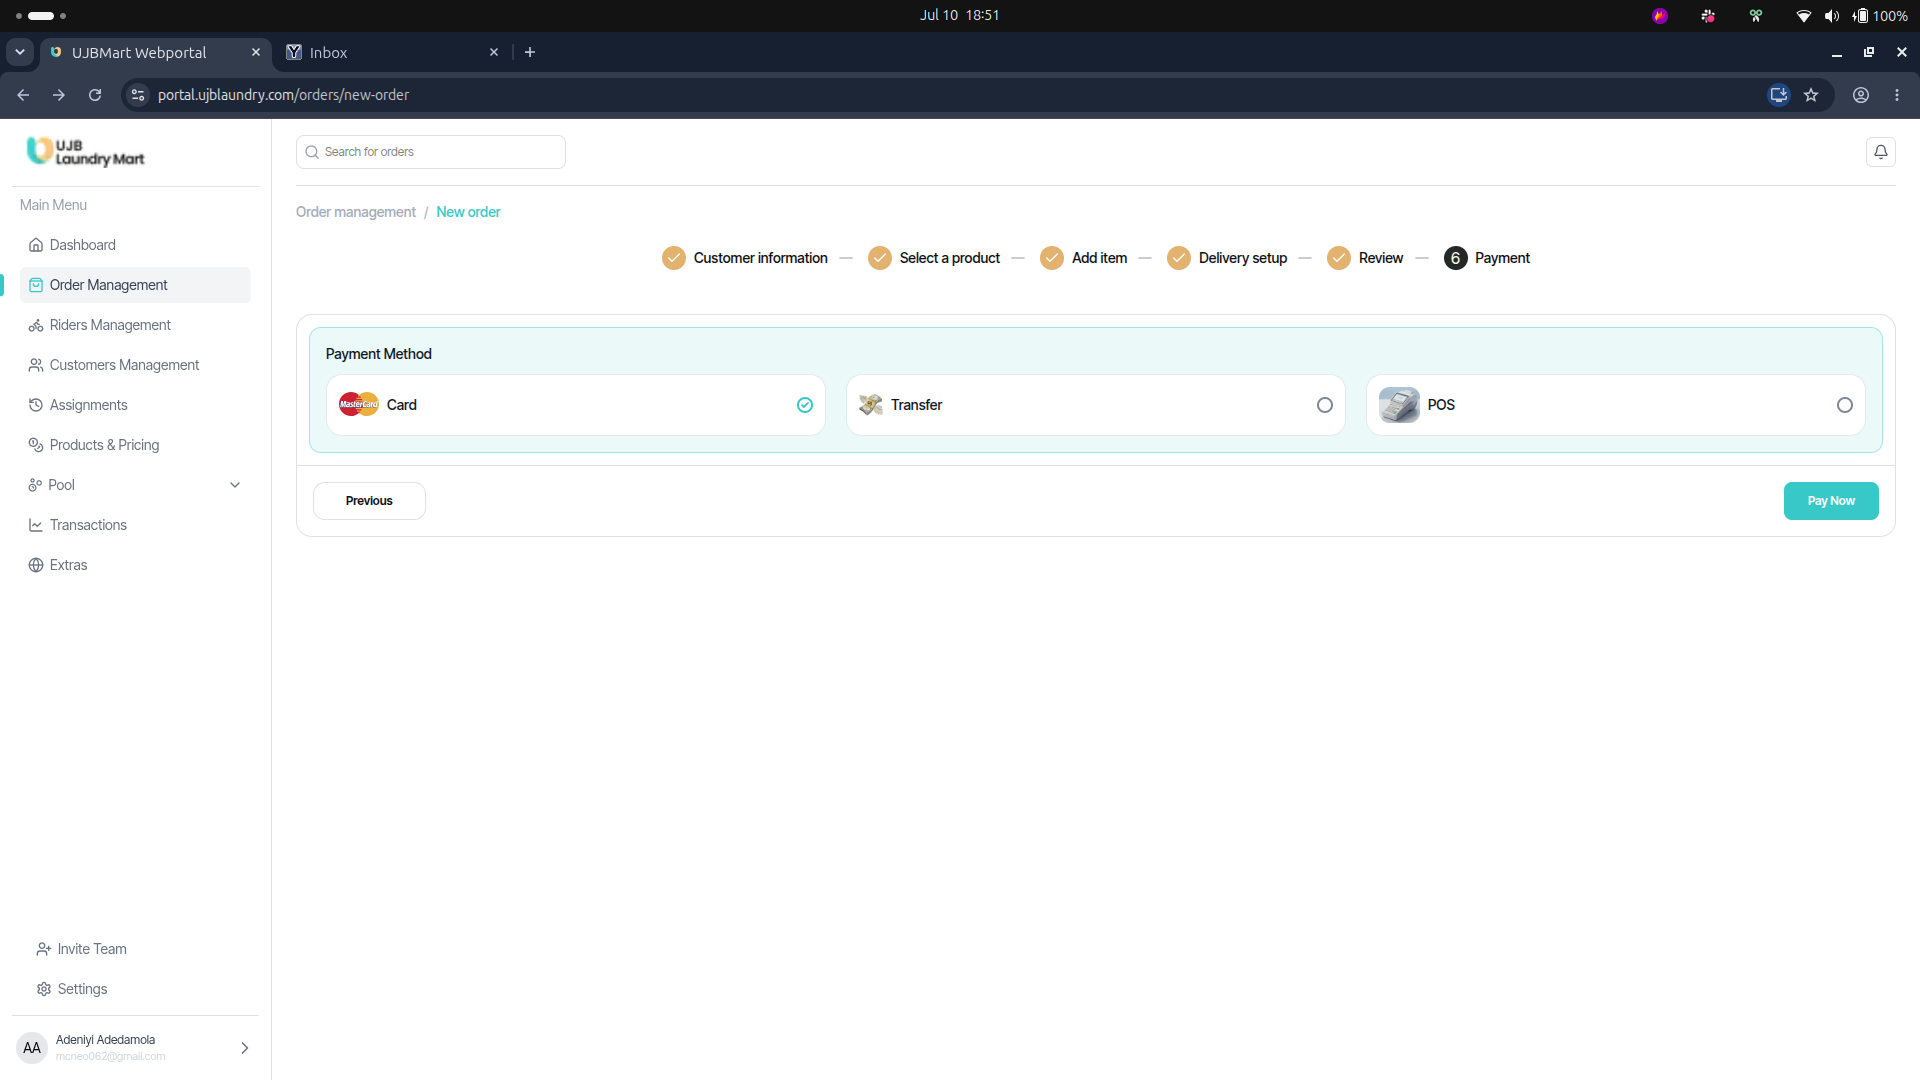
- Payment: Select one of three supported checkout modalities: Card, Transfer, or POS. Completing the payment gateway prompts the system to flag the order as confirmed.
Standard Order Status Lifecycles
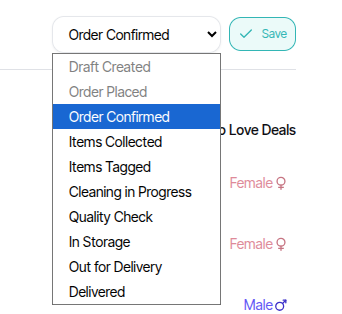
Once payment is completed, admins track and update standard lifecycles via the drop-down menu using the following 10 milestones:
-
Draft Created: Set immediately as soon as the order creation wizard is opened.
-
Order Placed: Triggered when the order details are finalized but payment is still outstanding.
-
Order Confirmed: Set automatically once payment has been successfully processed.
-
Items Collected: Updated when the laundry has been collected from the client.
-
Items Tagged: Applied when sorting and tagging items at the hub before washing.
-
Cleaning in Progress: Active laundry treatment is underway.
-
Quality Check: Post-clean quality assurance check.
-
In Storage: Held in the warehouse layout awaiting a courier.
-
Out for Delivery: Handed off to a rider who is actively en route.
-
Delivered: Package successfully dropped off at its destination.
2. Pick-up Requests
Pick-up requests are created by customers directly from their mobile devices via the customer-facing app. Because tracking details are unknown at submission, these utilize a specialized 12-step validation workflow within the admin portal.
Step-by-Step Pick-up Execution Pipeline
Step 1: Order Placed: The request appears on the dashboard immediately after the user submits a pickup inquiry from their phone.
Step 2: Collection Scheduled: An admin clicks the Assign Rider button in the top-right corner of the order details page to schedule a rider to pick up the items.
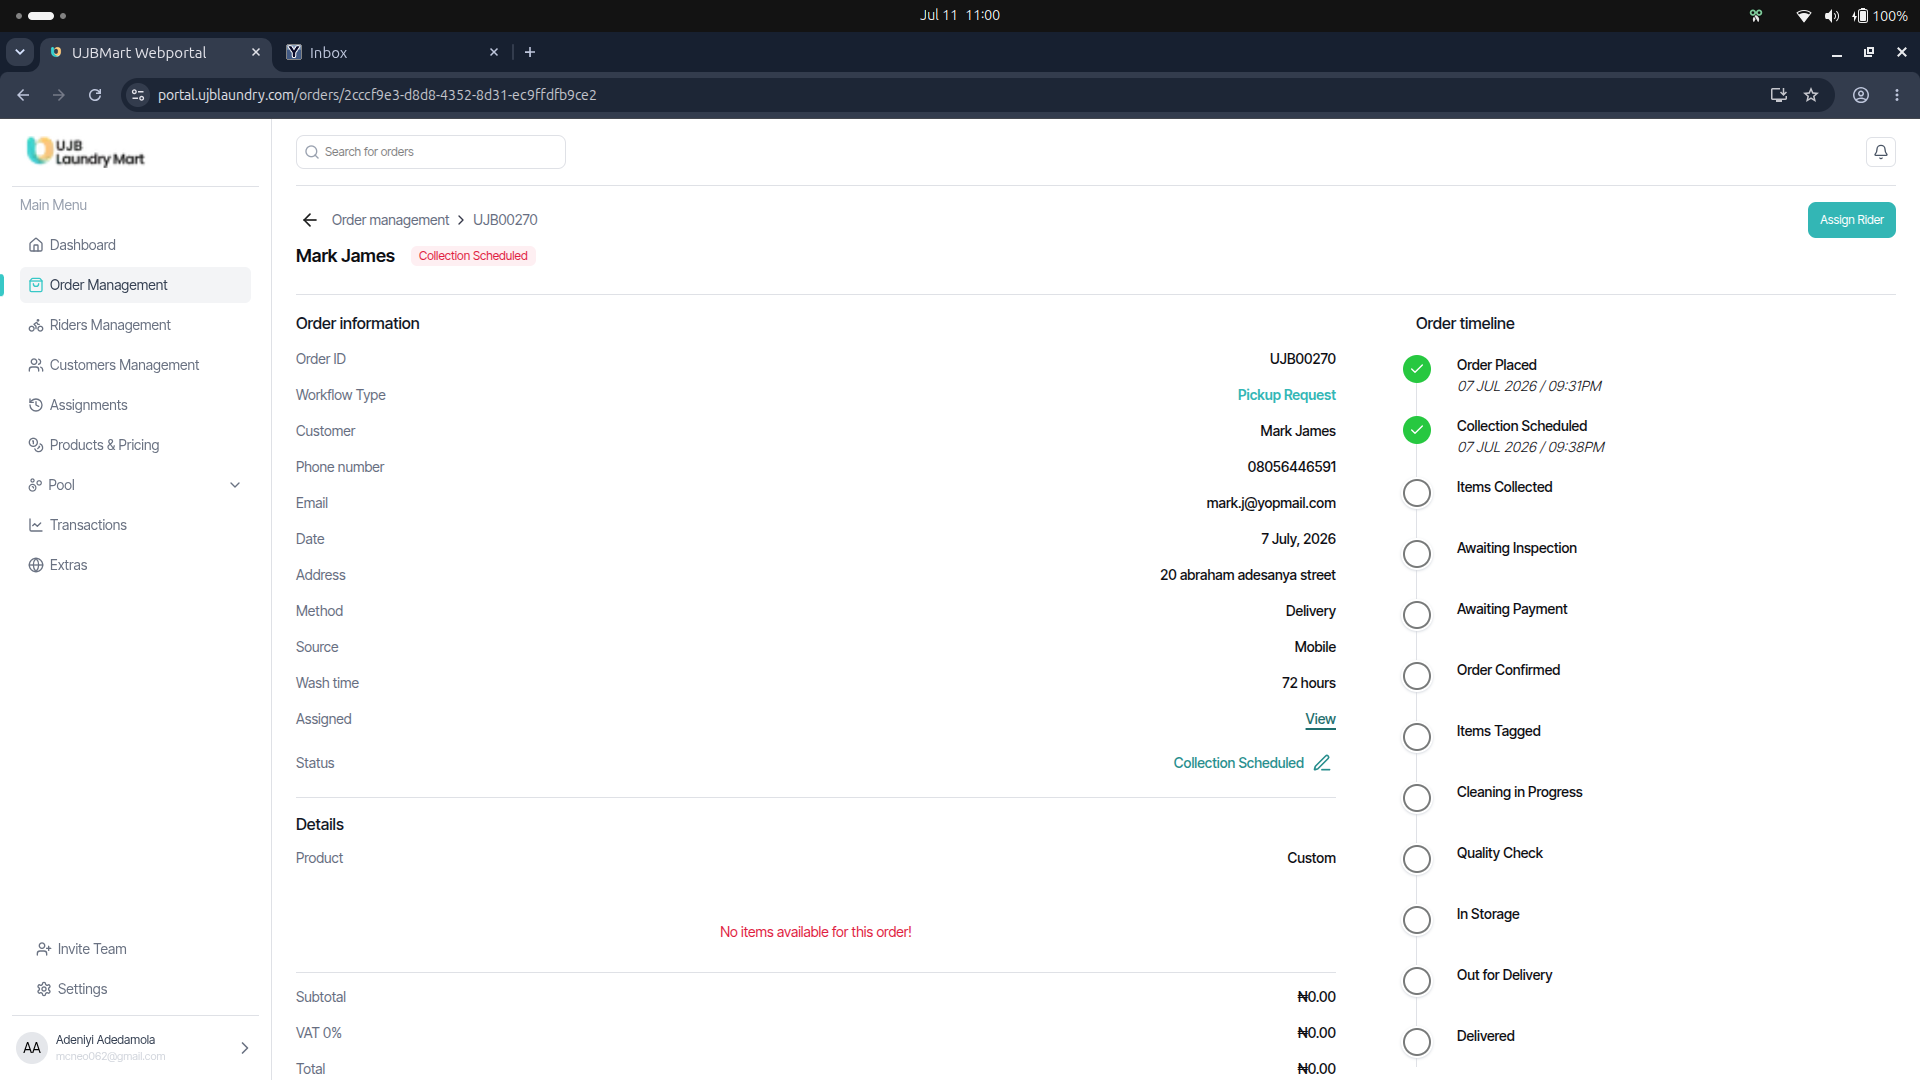
📋 Rider Assignment Note: A rider must fully complete their profile details in the database to be eligible for assignment choices.
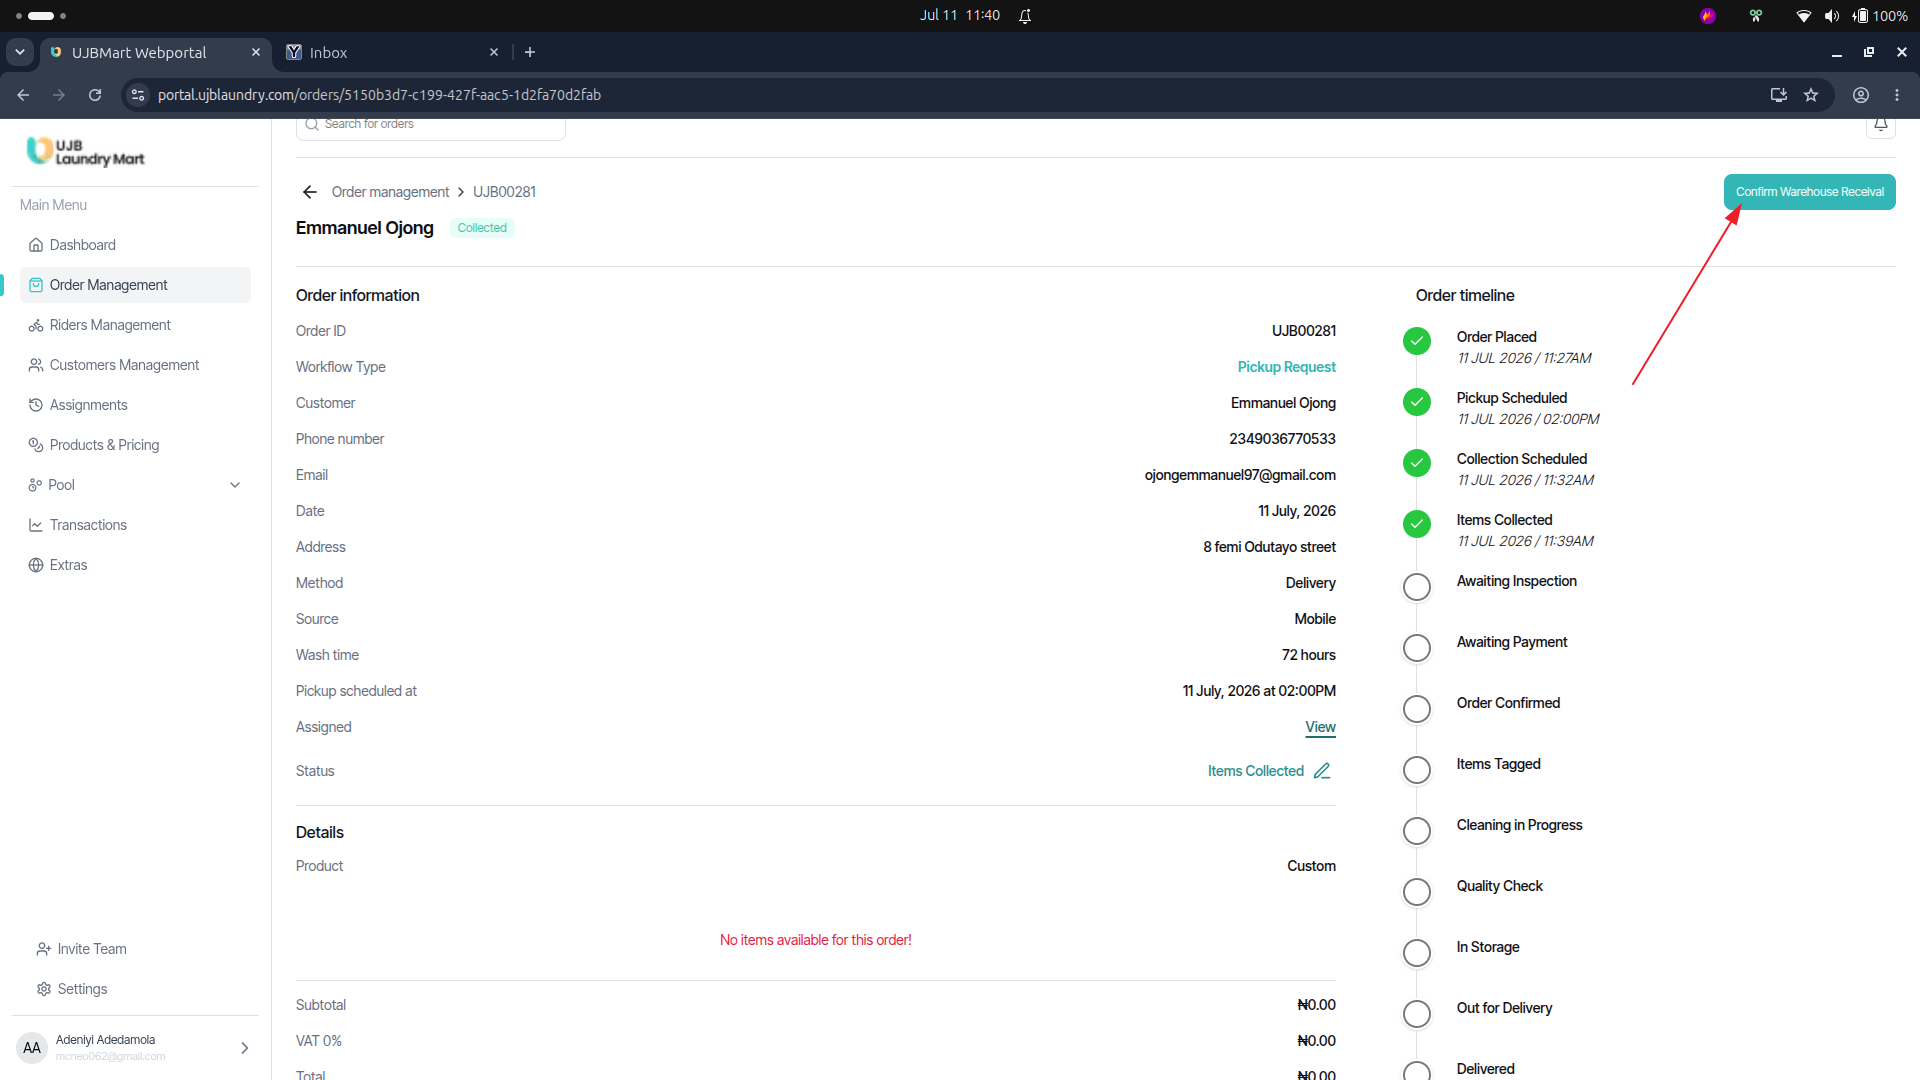
Step 3: Items Collected: The assigned rider retrieves the clothes from the customer's location. Once picked up, the portal status transitions to Awaiting Inspection.
Step 4: Awaiting Inspection: Once the bundle arrives at the processing facility, an admin checks the items for notable defects. Click the Confirm Warehouse Receival button to launch a mandatory processing form:
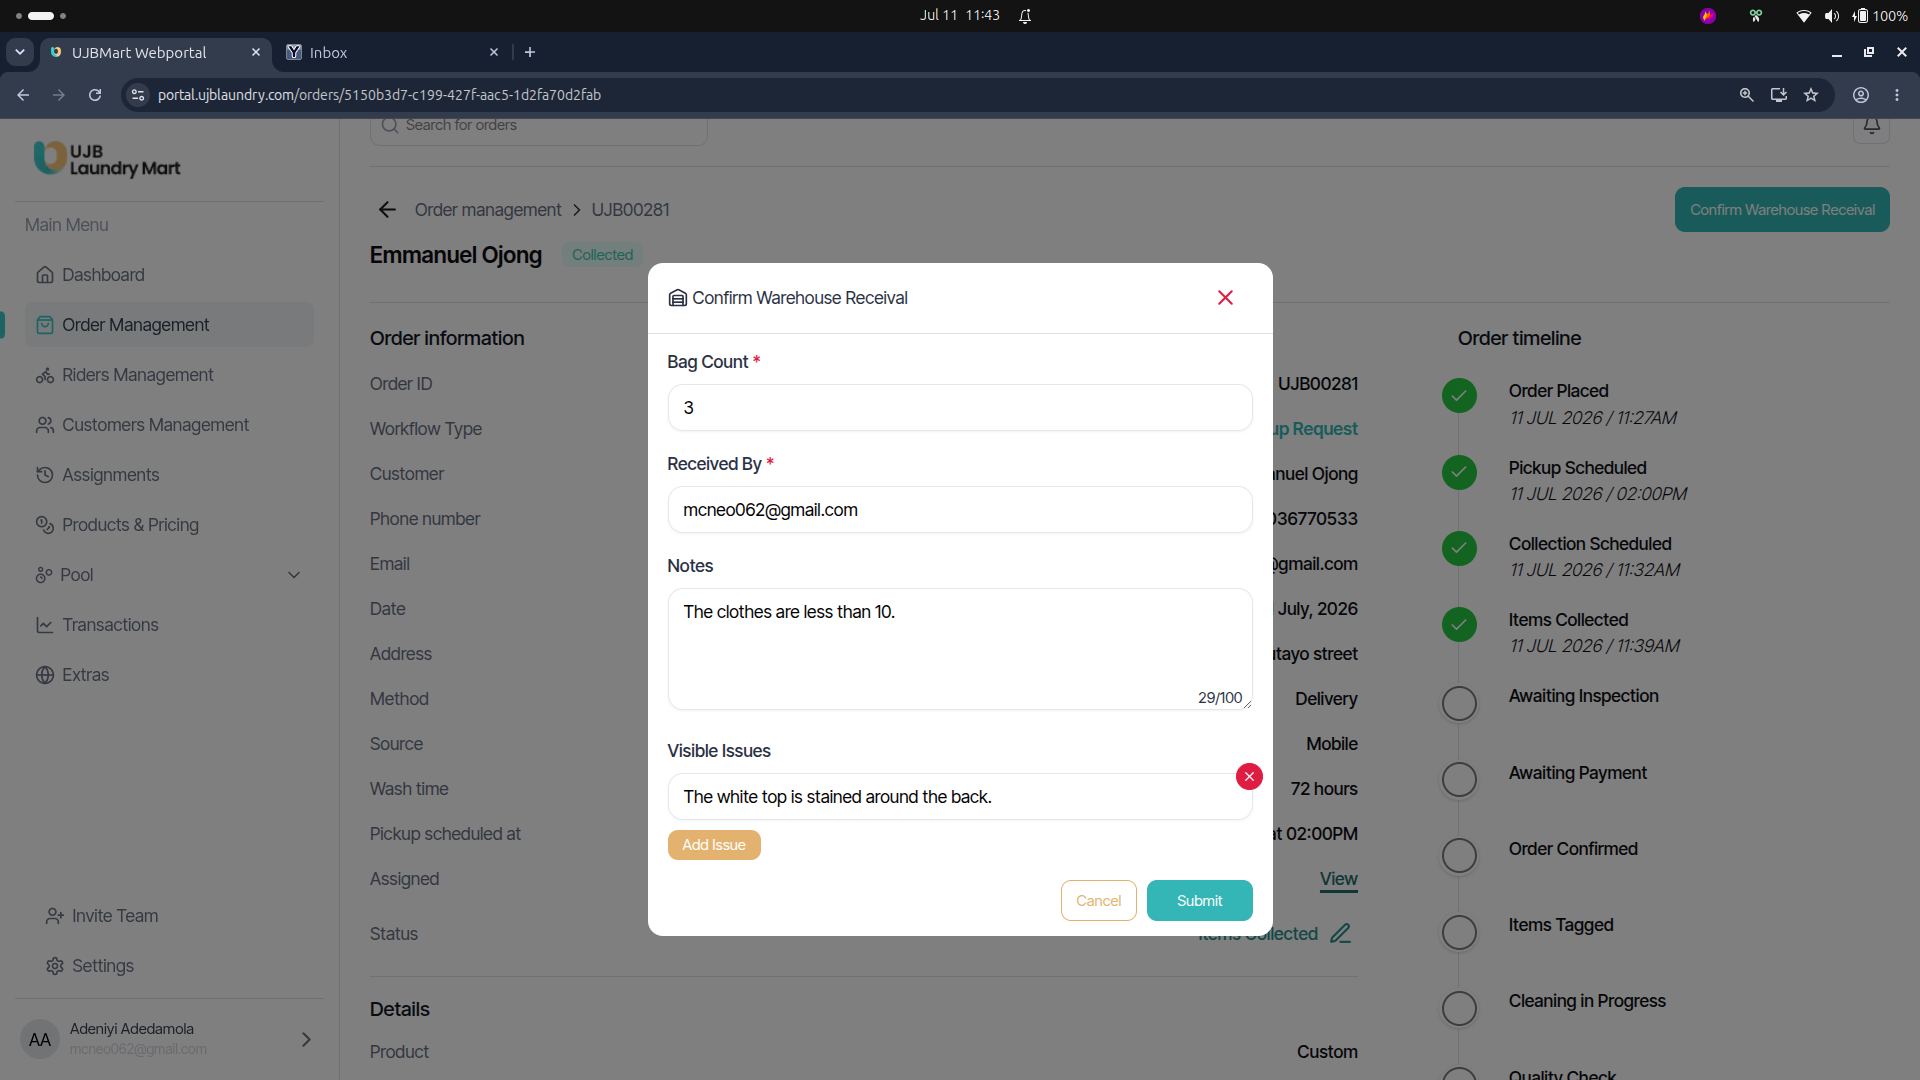
Bag Count: Input the total number of physical bags received.
Received By: System captures the validating admin's email identifier.
Notes & Visible Issues: Log specific notes (e.g., "The clothes are less than 10") and note any prior fabric defects (e.g., "The white top is stained around the back") to protect against liability claims.
Step 5: Awaiting Payment: Following inspection, admins must manually map items and services to compute the bill. Click Add Items to access the itemization popup:
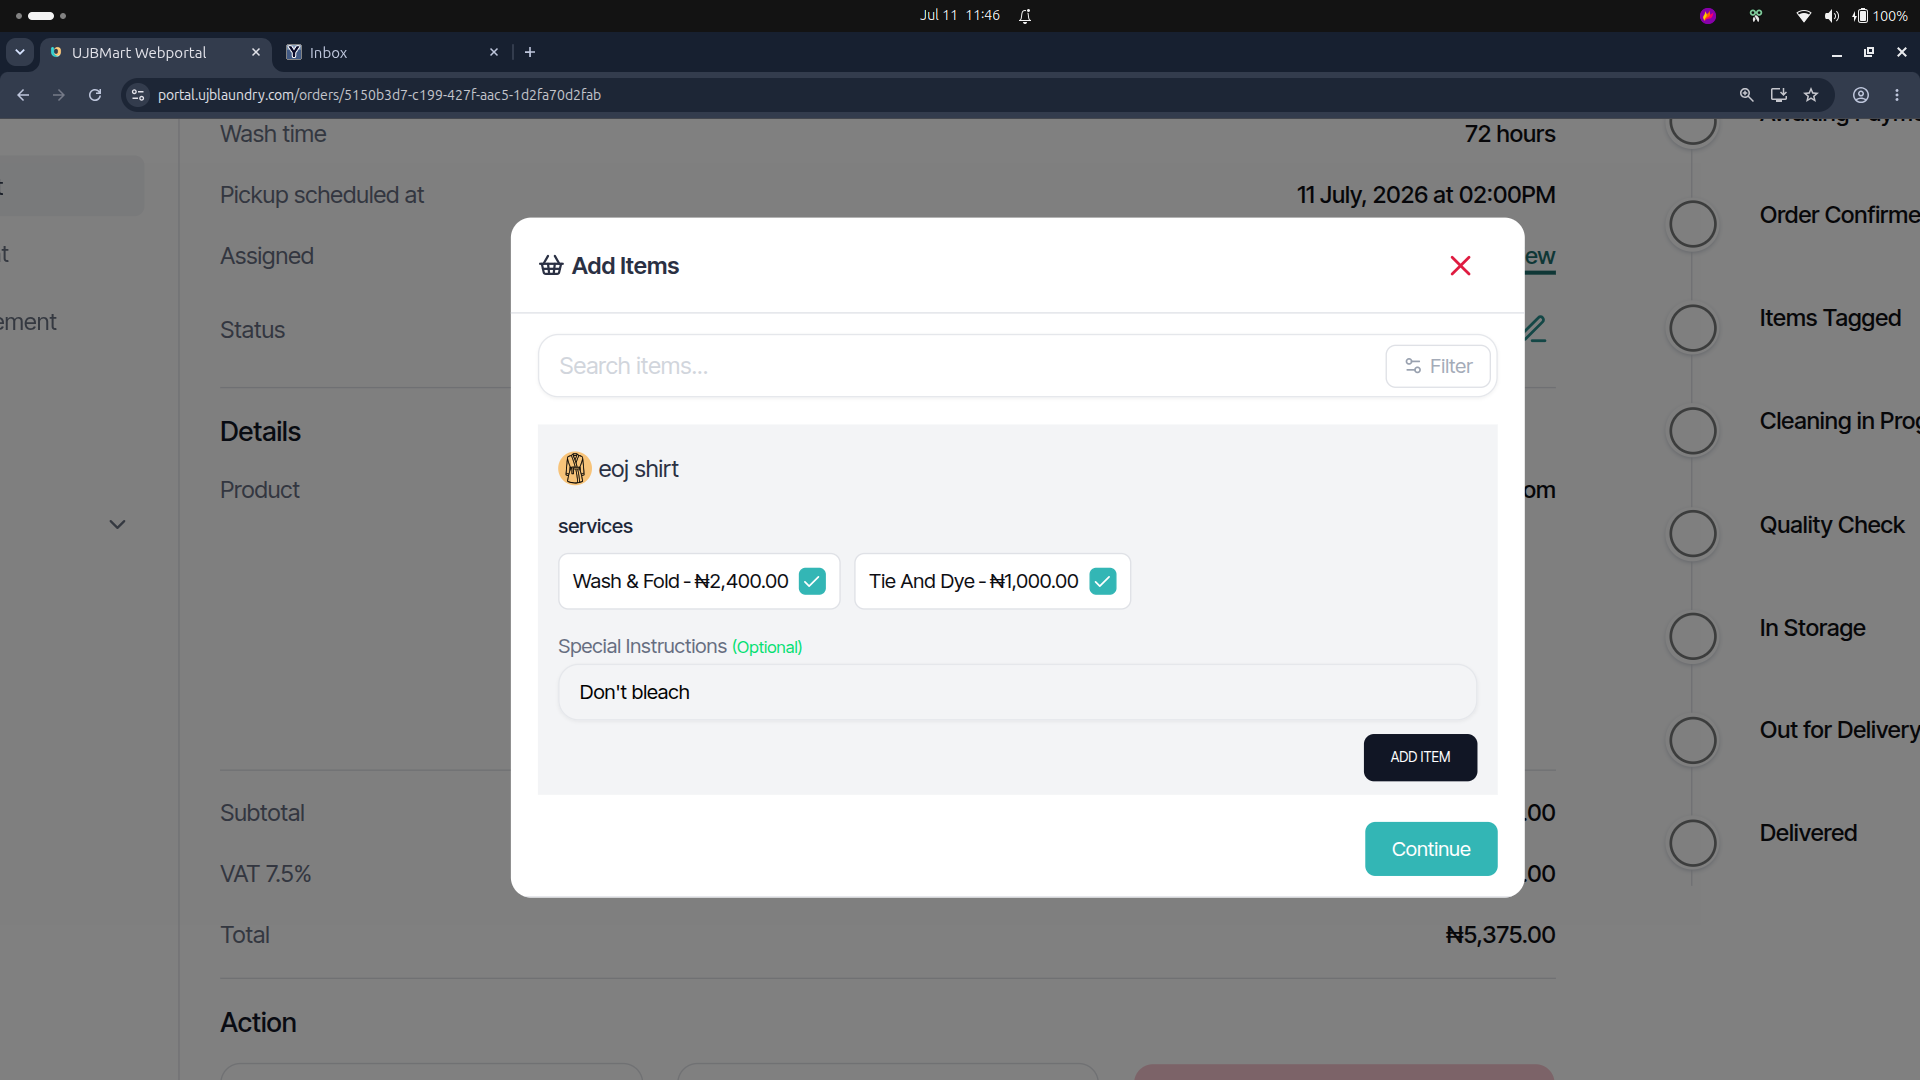 Search and select individual garments (e.g., eoj shirt).
Check corresponding service variations (e.g., Wash & Fold - ₦2,400.00, Tie And Dye - ₦1,000.00).
Special Instructions: Add optional fabric handling updates (e.g., "Don't bleach") before saving the selections.
⚠️ Strict Constraint: All garments and their corresponding service treatments must be added before the customer can pay and transition the request to the Order Confirmed phase.
Final Processing Steps (Steps 6–12) Once the customer reviews the generated invoice on their phone and pays, the remaining operational stages mirror standard workflows to completion:
Step 6: Order Confirmed
Step 7: Items Tagged
Step 8: Cleaning in Progress
Step 9: Quality Check
Step 10: In Storage
Step 11: Out for Delivery
Step 12: Delivered